When you’re short on time or money, it makes sense to DIY your beauty regimes. Why not have a girly day with a couple of friends and turn it into a beauty working bee? I do have one piece of advice though – get the eyebrow – shaping over and done with before open that bottle of chardonnay!
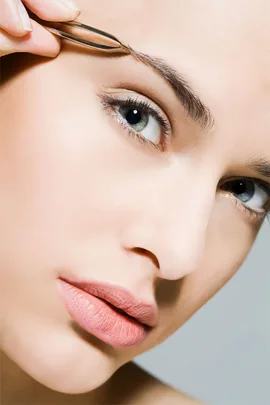
DIY BRoWS
Think about the shape you want before you start plucking. Check out photos of models or celebs, then examine your face shape and the shape your brows naturally grow in. Always tweeze in daylight and use a magnifying mirror.
Dab the brow with an ice cube to numb the pain.
Brush browns to find a natural arch.
Hold a pencil vertically along the side of the nose. Your eyebrow should start at the outside of the pencil.
Hold a pencil to the out side of the eye. This is where the eyebrow should end.
Pluck hairs in the direction of growth.
Tweeze slowly.
TIP! Salons offer eyebrow tinting but for the DIY-er, it’s safer to stick to temporary colour. Use a soft brown pencil or apply brown or grey eyeshadow with a small, hard brush that’s flat and and angled at the tip.
DIY oANICURE
Get rid of old, chipped lacquer with a non-acetone nail polish remover that is gentle on nails.
File nails to your desired shape. The hot look right now is a shortish nail, straight across the top with rounded edges. File in one direction only, unless you are using a very fine grit file.
Use a buffing block to smooth the nail surface down.
Squeeze on a thin strip of cuticle cream. After 15 seconds, push the cuticle back gently with a manicure stick. Wash away excess with warm, soapy water.
Apply a base coat to help prevent discolouration. Let it dry for one minute.
Apply two coats of your favourite colour. You should be able to cover the nail in three strokes – one on each side and one in the middle.
Finish off with a top coat for a smudge-free finish and a lasting manicure. You can apply top coat daily to prevent chipping.
DIY PEDICURE
Soften hard skin and cuticles by soaking your feet in warm water for at least 10 minutes. The more cracked and calloused your feet are, the longer they will need to stay in. For a natural boost, squeeze some fresh citrus juice into the water. It smells good and the alpha hydroxy acids in the fruit will start working away on any dead skin.
Rub on a grainy scrub and then rinse.
While skin is still damp, rub on a little cuticle cream and massage into the base of your nails. Gently push back cuticles with a clean cuticle stick.
Trim nails straight across to the edge of your toes and file the corners slightly.
Buff away stubborn rough skin with a foot file or pumice and massage in a rich moisturising cream. Put on a pair of cotton socks and leave to soak in.
Nails need to be completely clean and free of any oil before applying nail lacquer or colour, so give them a wipe with polish remover.
Put on a base coat, two coats of colour and a top coat, giving each layer about a minute to dry. For salon-perfect nails, paint a fat stripe of colour down the centre of each nail, then do the sides. Use any nail polish left on the brush to dab on the top edge of the nail. This will help to prevent chipping.
Related stories
Native ad body.
Native ad body.


Native ad body.