If the thought of running a blade across your face makes you flinch, stay with us because dermaplaning isn’t about stubble, razors or five o’clock shadows. This popular non-invasive skincare treatment is all about giving your skin a fresh start.
Using a fine, surgical scalpel, dermaplaning gently and painlessly removes dead skin cells and peach fuzz (vellus hair). The result? It instantly reveals a brighter, softer complexion and with no tiny hairs to interfere, it helps make-up glide on like silk. Plus it supercharges your skincare routine by allowing serums and moisturisers to absorb more effectively.
Star power

Ideal for achieving flawless skin, Hollywood heavyweights such as Mindy Kaling, Gwyneth Paltrow, Miranda Kerr and Reece Witherspoon are all said to swear by the treatment, while A-lister Eva Mendes has embraced dermaplaning as a regular part of her skincare routine. “I love it!” says Eva, adding it helps “make-up and moisturiser go on much smoother”.
Your step-by-step guide
While professional dermaplaning typically yields the best results, at-home dermaplaning can be a safe and effective option if done correctly – and at a fraction of the cost.
What you’ll need:
- A dermaplaning tool – usually a small, hand-held razor or dermaplaning device
- A mirror with good lighting
- A clean towel or cloth
- Skincare products to apply post-dermaplaning, like serums or moisturisers
1. Cleanse thoroughly
Start with a clean canvas. Use a gentle cleanser that suits your skin type to remove any make-up, dirt or oils. Pat your face dry with a clean towel, ensuring your skin is completely dry before starting.
2. Hold your skin taut
To avoid any pulling or irritation, gently hold the skin taut with one hand. This is especially important for areas around your eyes and jawline. Keeping your skin taut helps the razor glide smoothly, making the process easier and safer.
3. Start dermaplaning
Hold the dermaplaning tool at a 45-degree angle to your skin. Gently and with short strokes, begin scraping the surface of your skin. Start at your forehead and work down towards your cheeks, nose and chin. Always move in the direction of hair growth. Avoid going over the same area too many times to prevent irritation and be gentle – don’t press too hard with the tool. Let the razor glide over the skin lightly.
4. Focus on problem areas
Pay attention to areas with more peach fuzz or dry patches, like around your eyebrows, upper lip and jawline. Be extra-careful around your eyes and nose – these areas are more delicate, so use shorter, gentler strokes.
5. Wipe away dead skin and peach fuzz
As you go, you’ll notice tiny flakes of dead skin and peach fuzz being removed. Keep a towel or cloth handy to wipe away the debris every few strokes.
6. Apply skincare
Once you’re done, your skin will be freshly exfoliated and super-smooth. Apply a soothing serum or moisturiser to nourish your skin. Hyaluronic acid or a hydrating moisturiser works great post dermaplaning to lock in moisture. Avoid using any harsh ingredients, like retinols, right after dermaplaning.
7. Protect your skin
Since dermaplaning removes dead skin cells, your skin will be more sensitive to the sun. Be sure to apply sunscreen – at least SPF30 or higher – after your routine, even if you’re staying indoors.
Top tip: Dermaplaning is generally safe for most, but if you have active breakouts, irritation or very sensitive skin, it may not be ideal.
Myth buster: Dermaplaning doesn’t affect the hair follicle or change the growth pattern, which means there is no risk of hair growing back quicker or thicker.
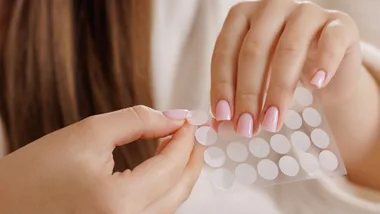
Your dermaplaning tool kit


Related stories

Native ad body.
Native ad body.


Native ad body.