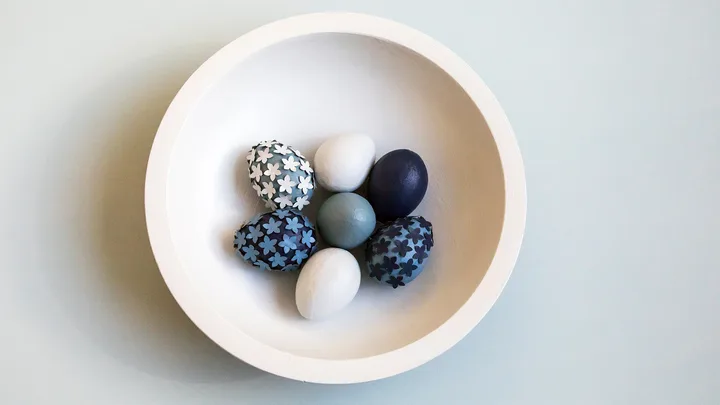
Crack into an Easter treat by crafting these gorgeous Easter egg decorations. It’s a wonderful weekend project to get the kids involved and where you can let your creativity flow. The outcome is a bowl of decorative delights that are perfect for Easter celebrations or all-year round.
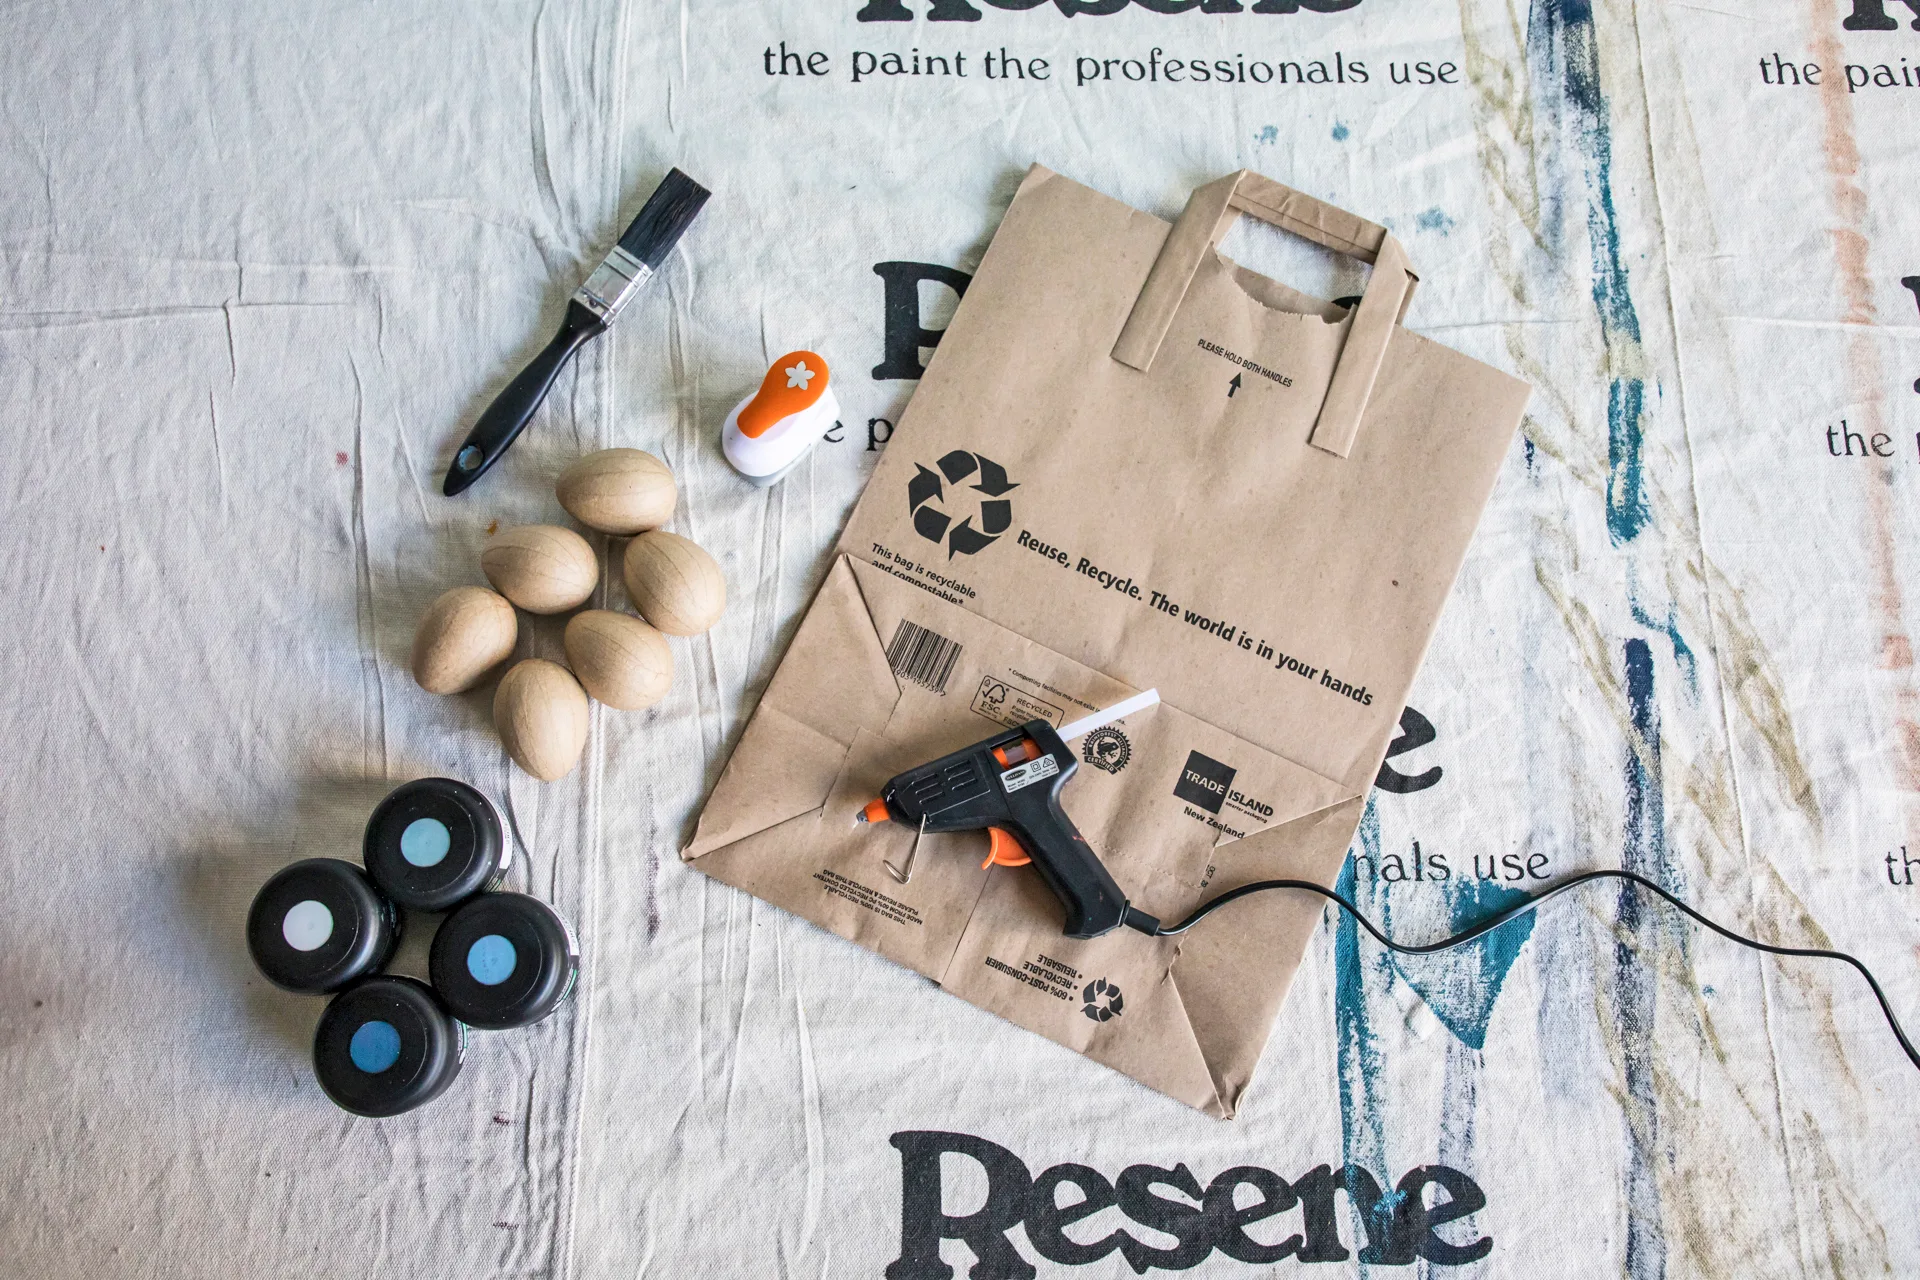
You will need
- Eggs to decorate (real, cardboard or plaster)
- Mid-weight paper, such as a paper grocery bag
- Scissors
- Craft punch
- Hot glue
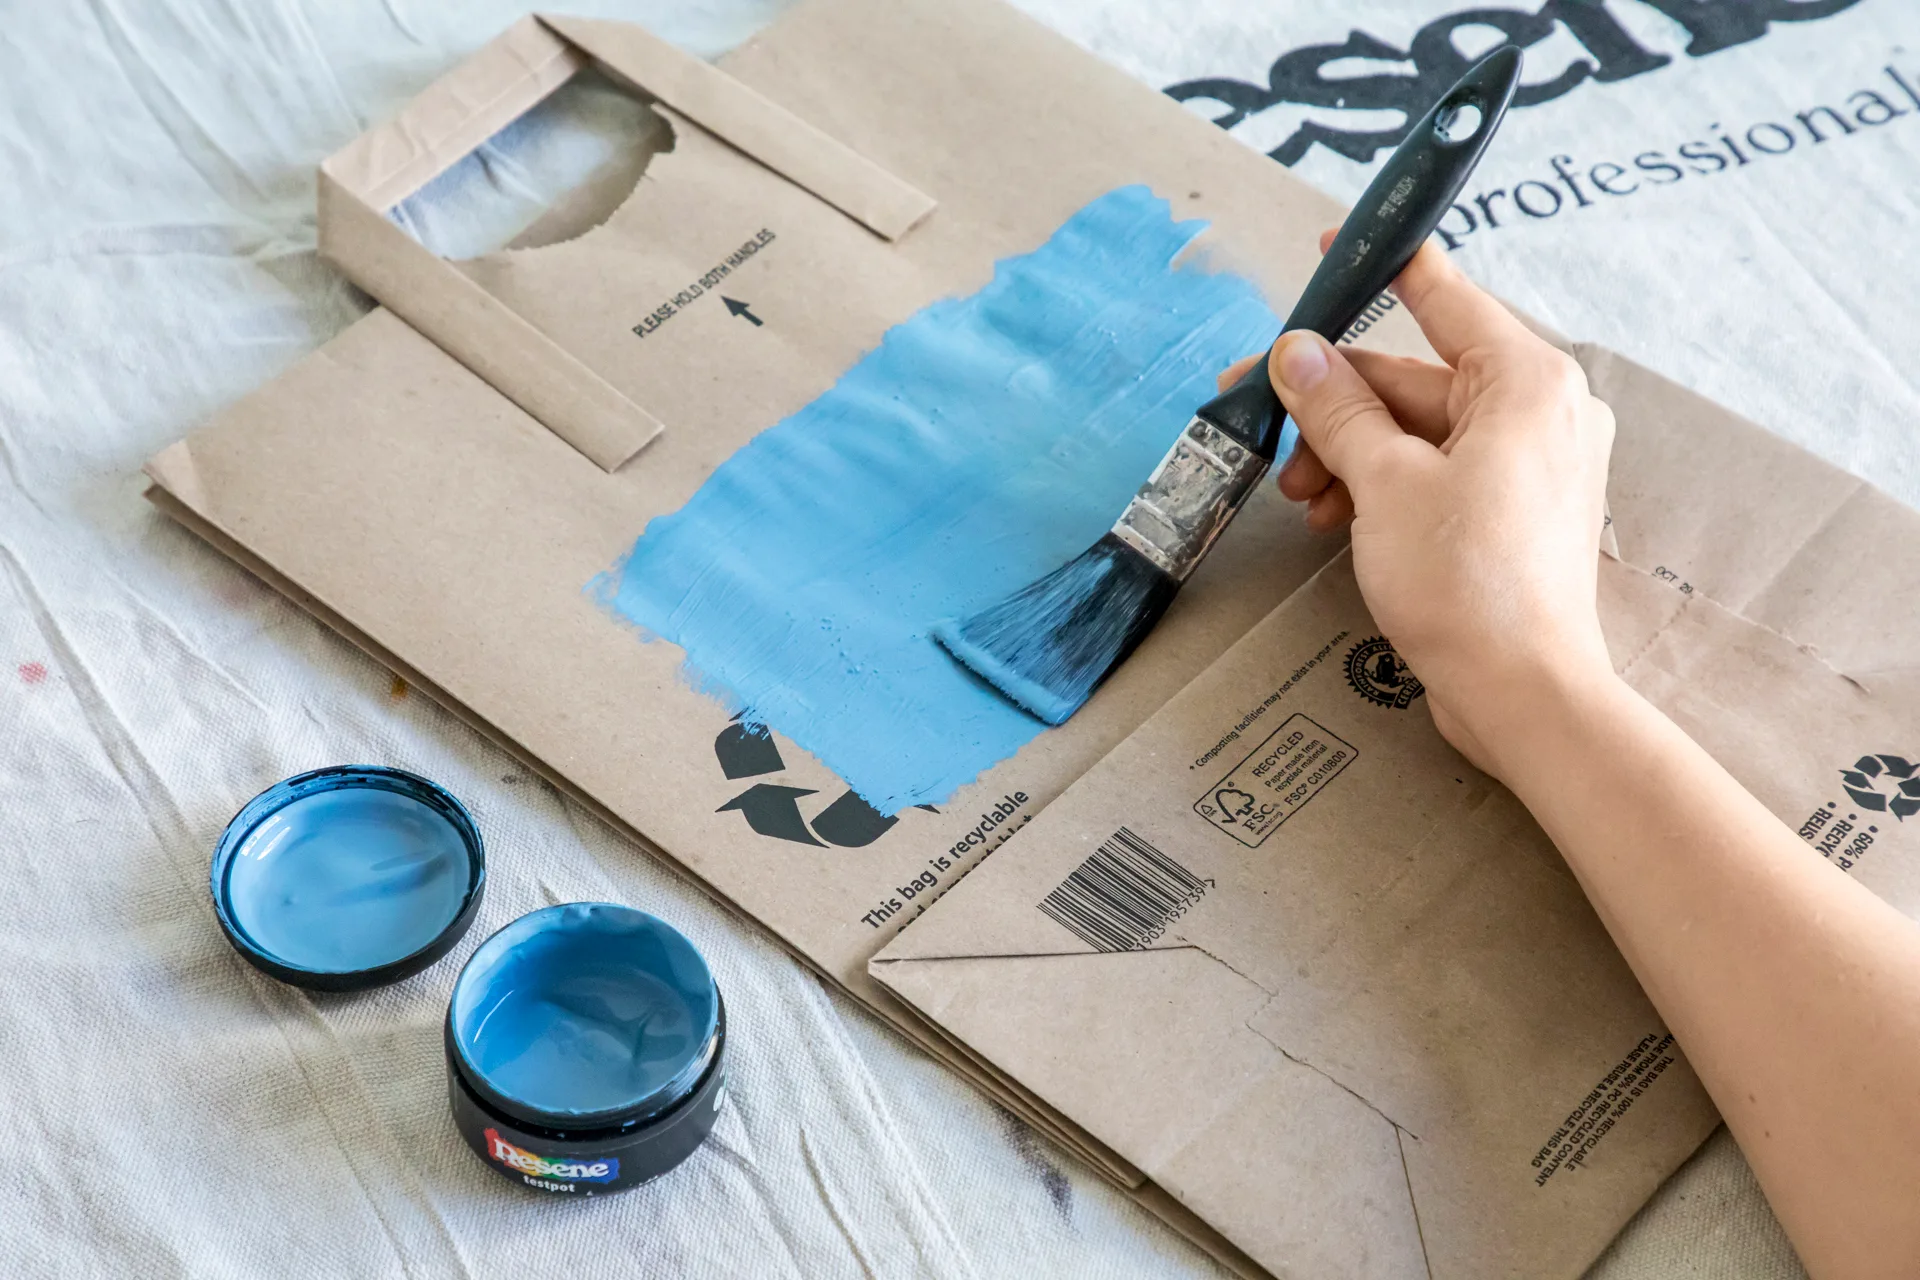
- Resene testpot brush
- Resene testpots in your choice of colours – we used Resene Duck Egg Blue, Resene Blue Bayoux, Resene Wedgewood and Resene True Blue
How to make the Easter egg decorations
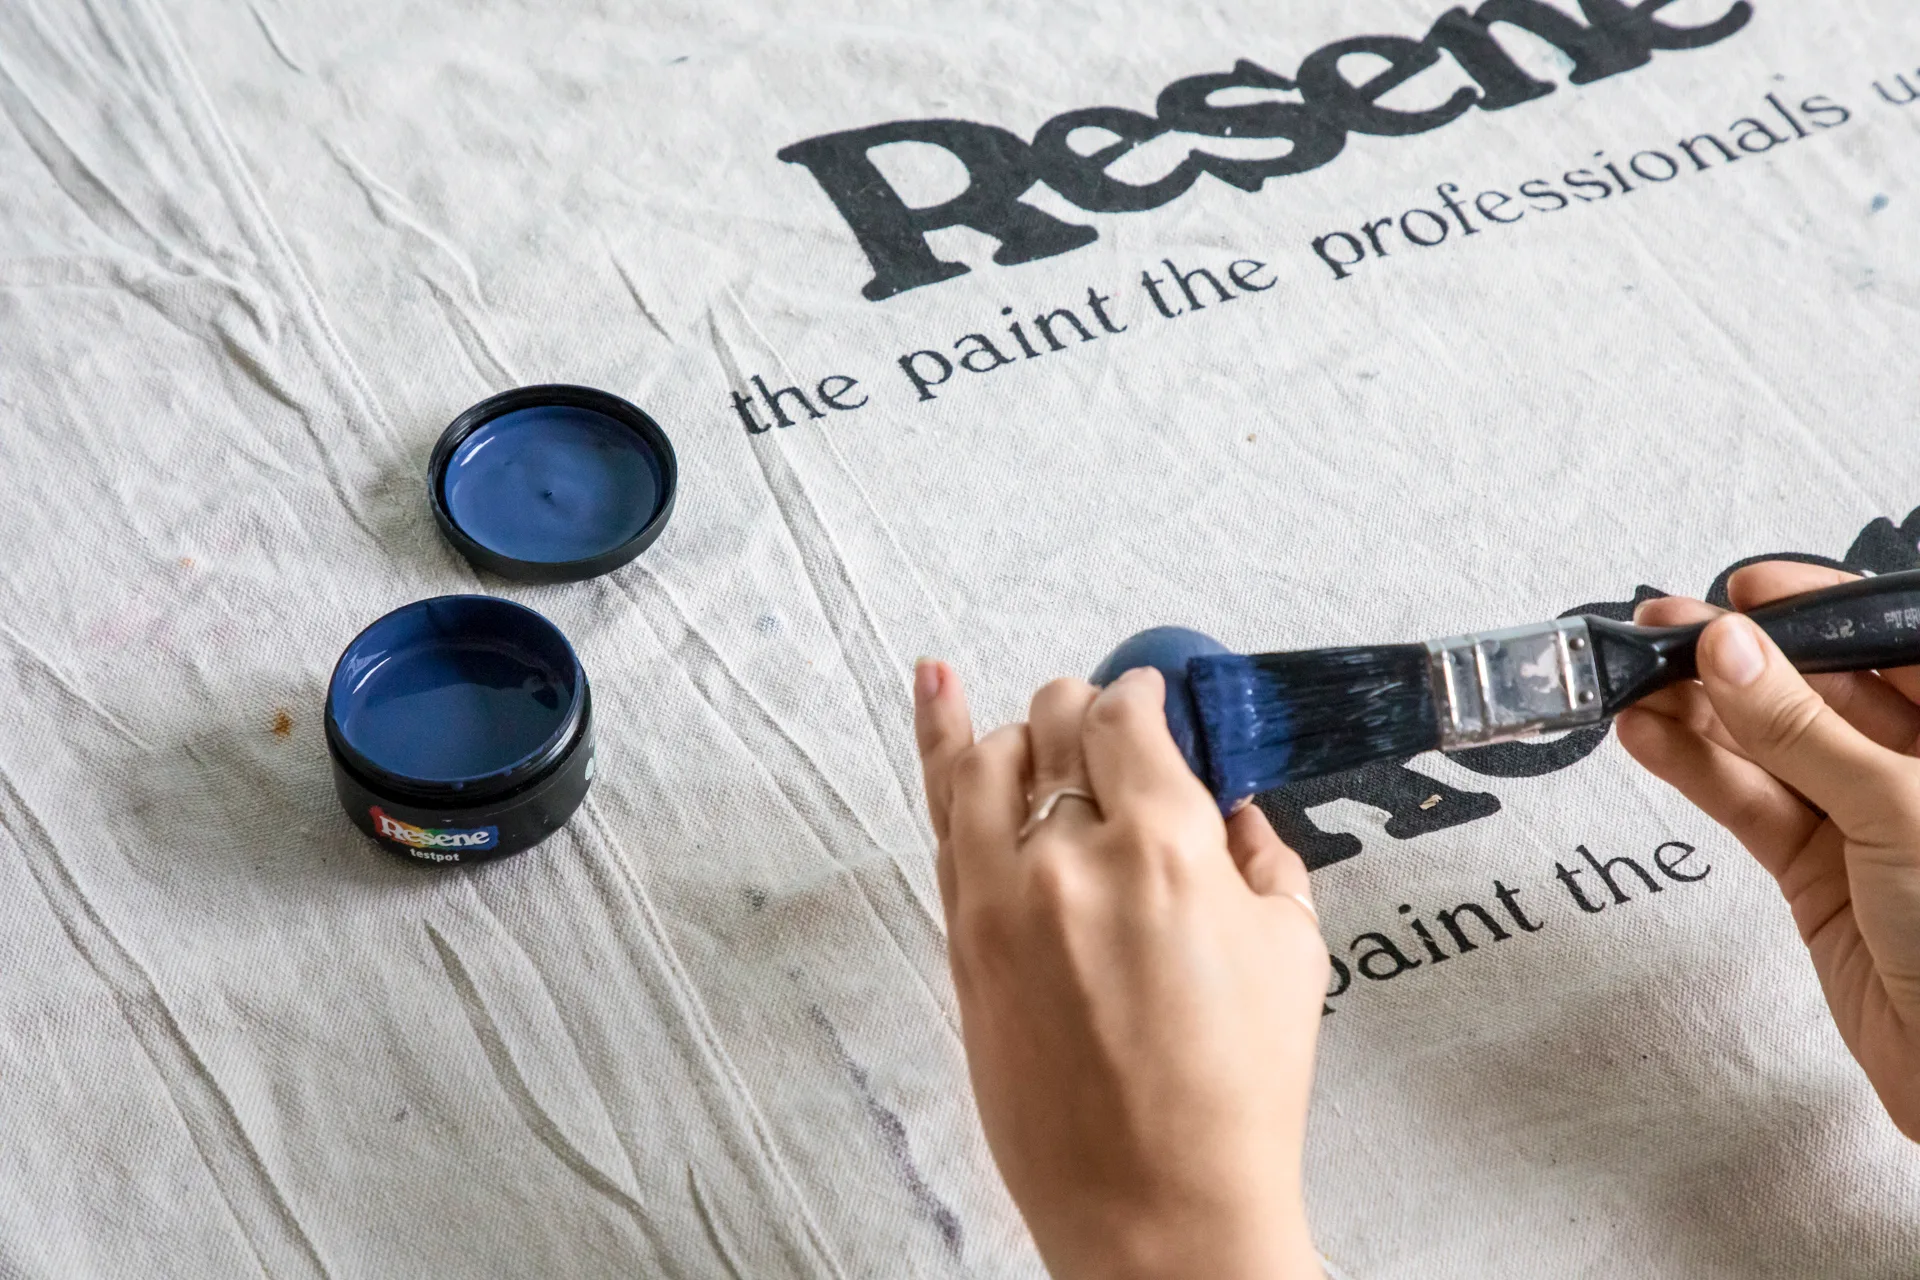
Step 1
Using a testpot brush and Resene testpots in your choice of colours, paint your eggs in one or more background colours – we used Resene Duck Egg Blue, Resene Blue Bayoux, Resene Wedgewood and Resene True Blue. For best results, paint two coats and allow the first to dry completely before adding the second coat.
Step 2
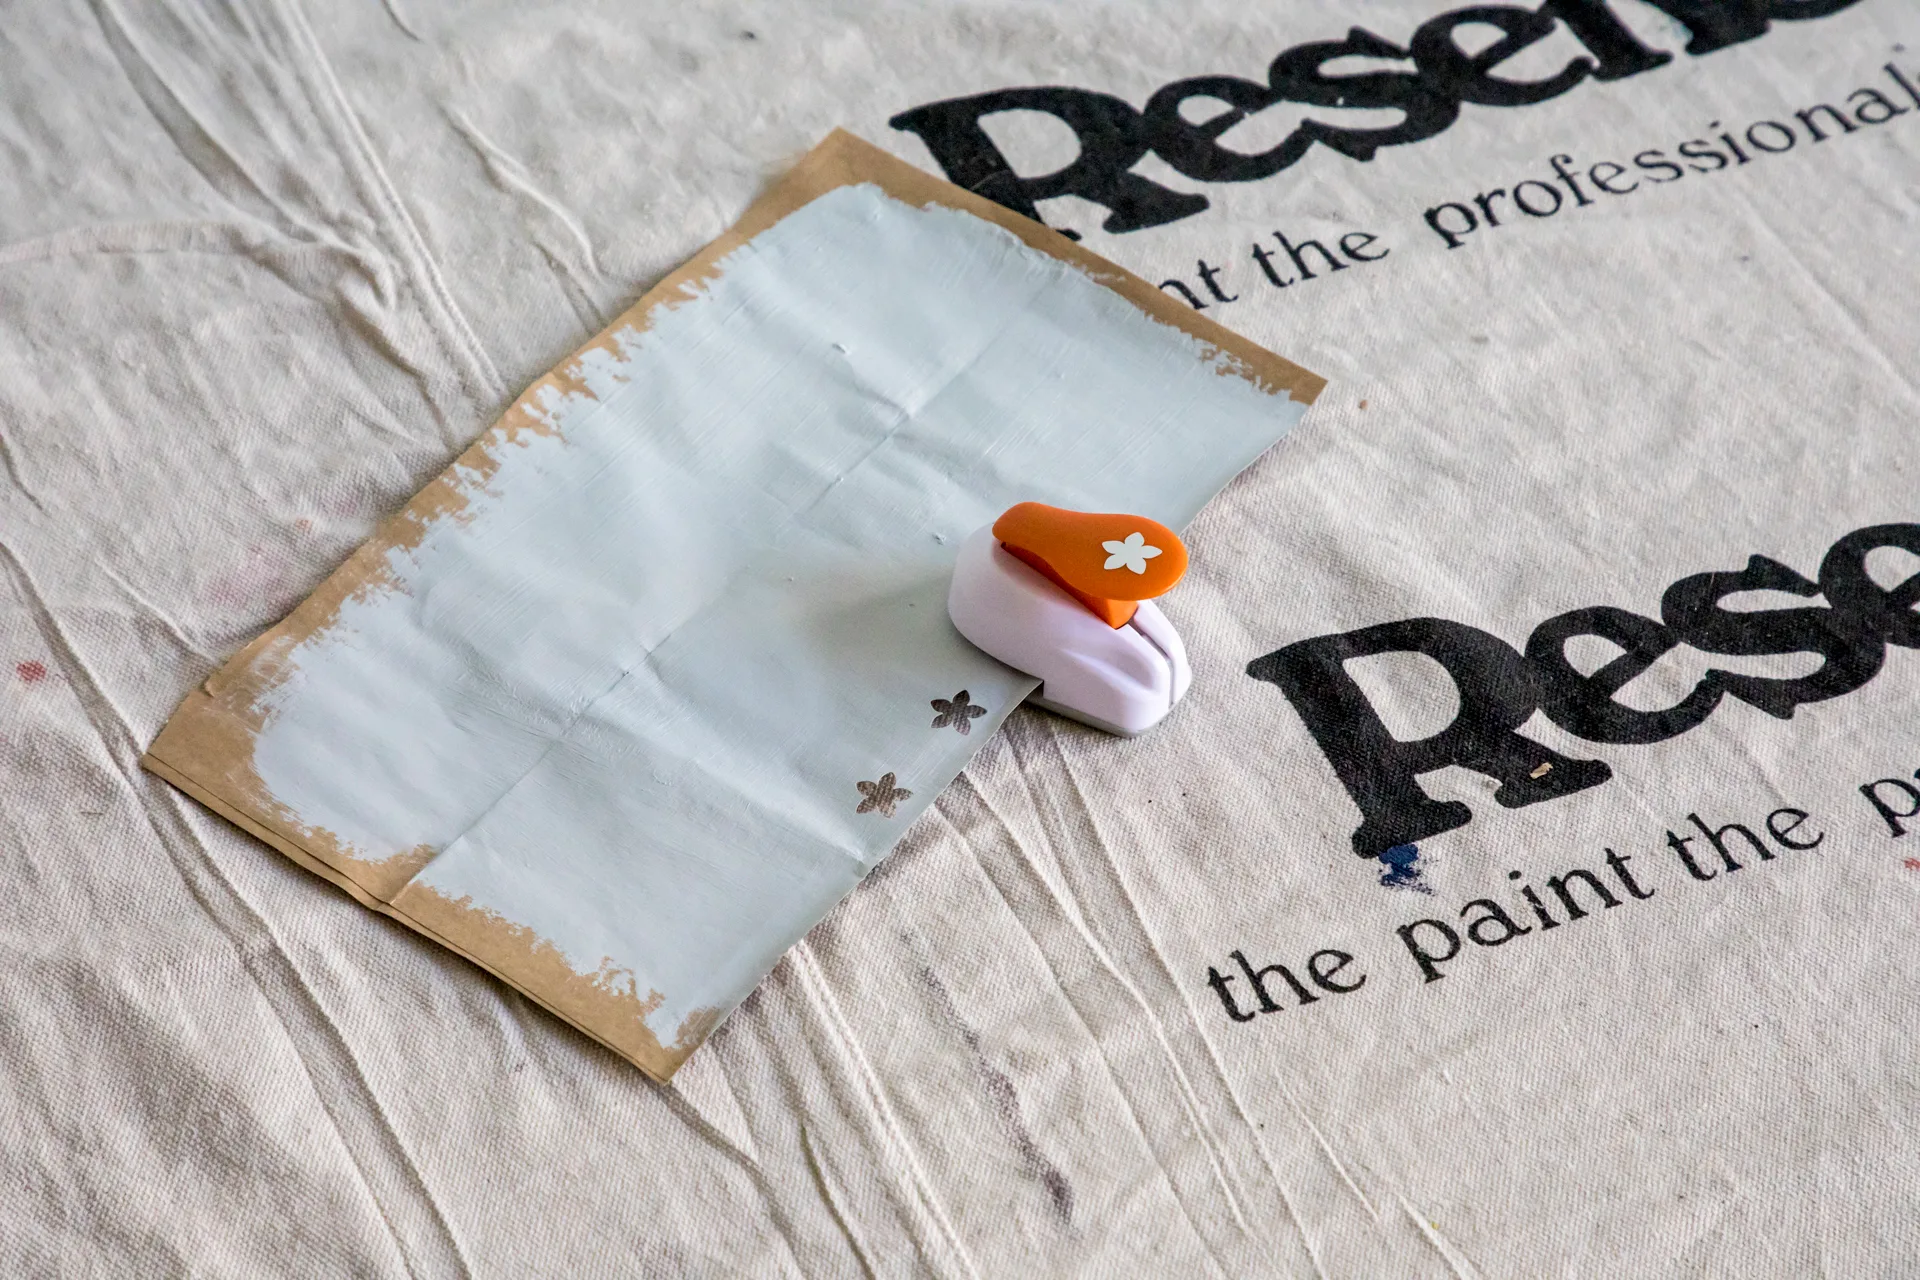
Using a testpot brush, paint sections of your mid-weight paper in one or more accent colours of your choice – we used Resene Duck Egg Blue, Resene Blue Bayoux, Resene Wedgewood and Resene True Blue. For the best coverage, paint two coats of each and allow the first to dry completely before applying the second. You can use a hair dryer to speed up the drying process, which can also help to keep your paper smooth when it’s dry.


Step 3
Cut out each of your painted sections. Using a paper punch, punch out your shapes. For the scale of our flowers, we needed approximately 45 to cover each egg. However, you may need more or less depending on what size and shape your punch is. If you prefer, you can cut out small shapes instead of using a paper punch.
Step 4
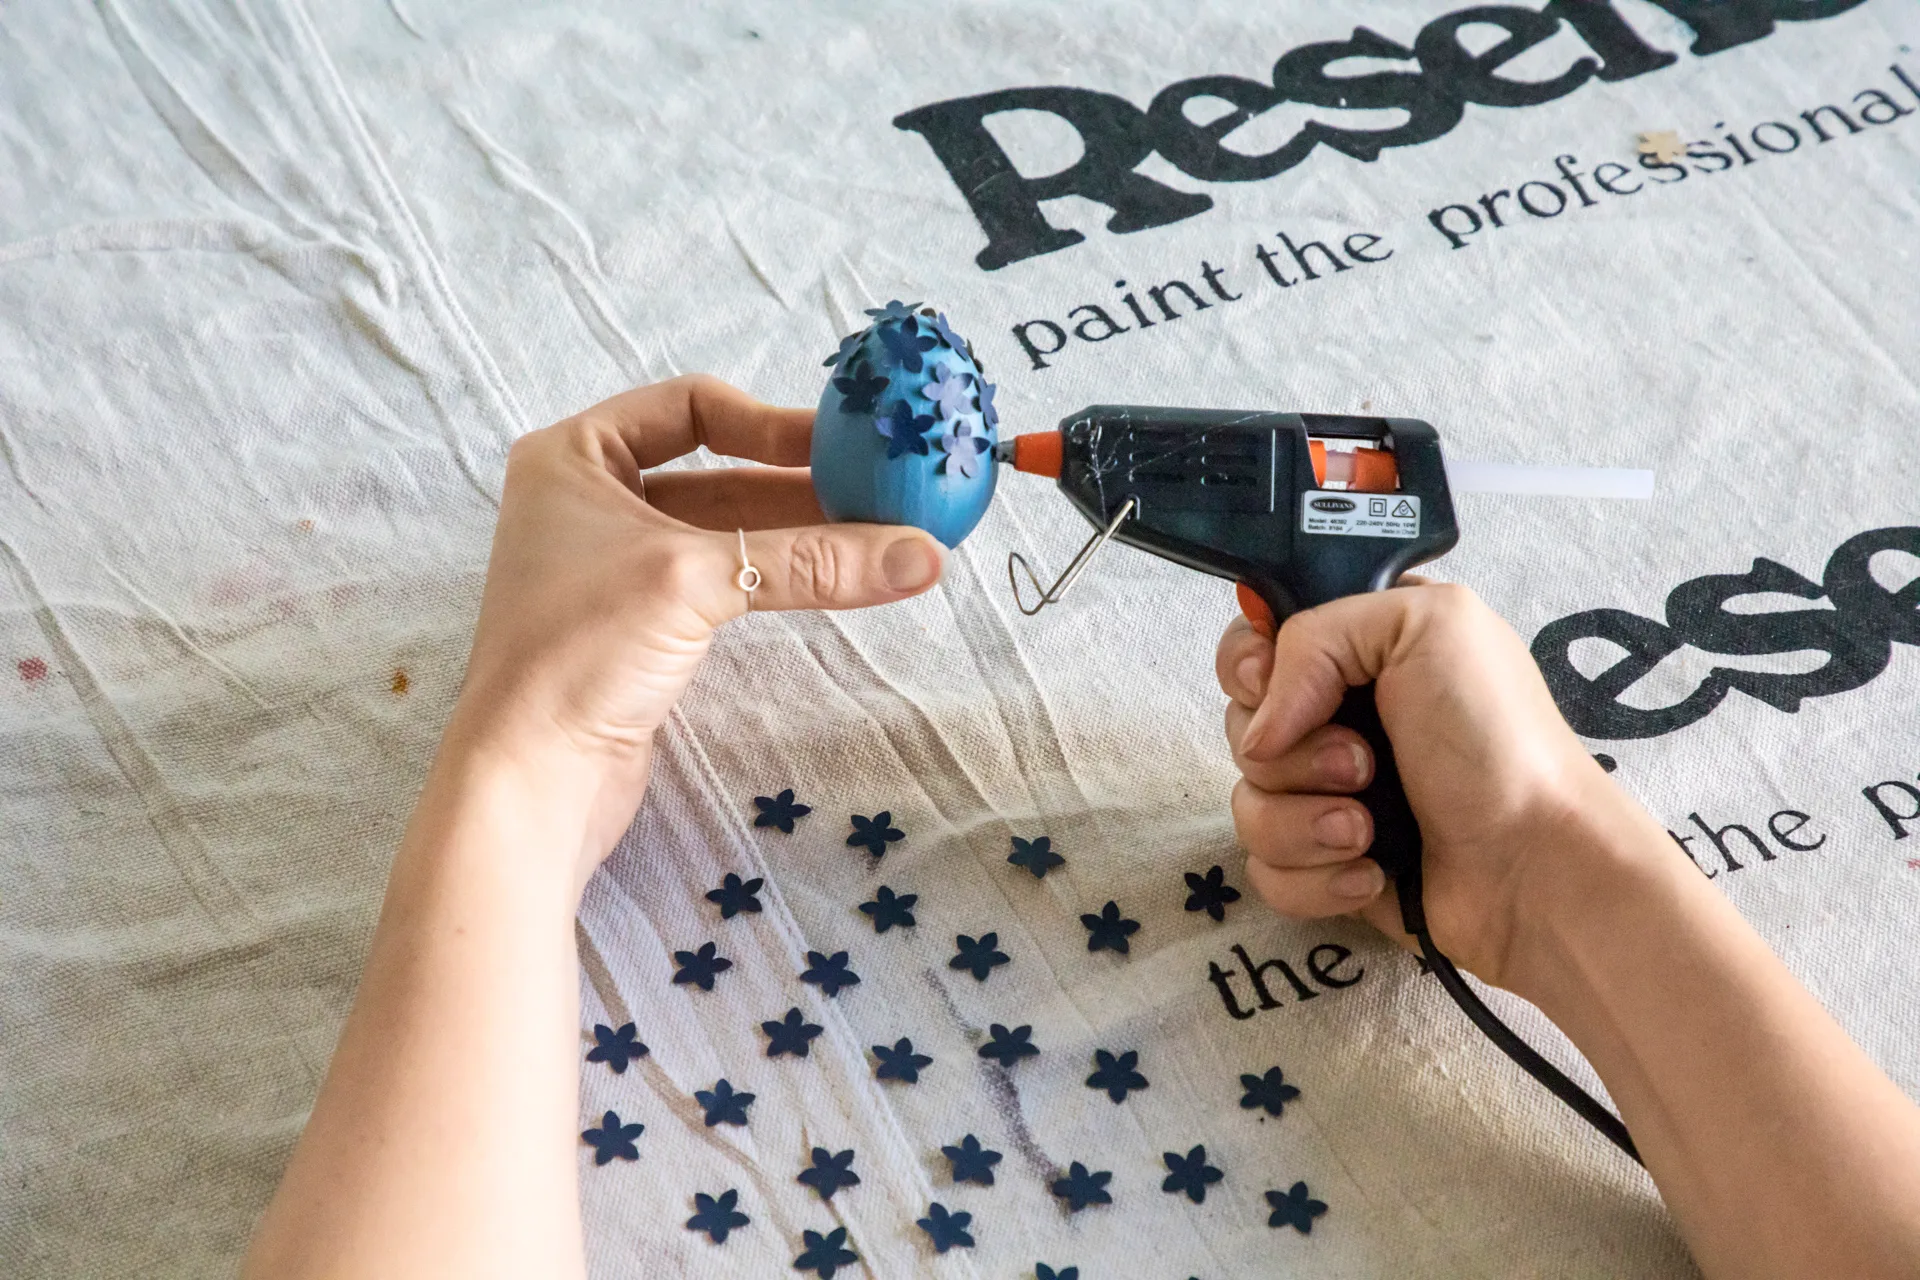
Affix the back of each of your punched out paper shapes to your egg with a small bead of hot glue. Leave small, even gaps between where you attach each shape until each egg is fully covered. When the glue sets, you can gently use your fingers to shape and curve your shape to give it more dimension – which works especially well for flower or heart shapes.
If you’re using real eggs, make sure you empty their yolks and whites using the pin prick method into a sealable container (see below). Try to retain as much of the shell in one piece as possible. Seal your container and store your egg yolks and whites in your refrigerator for up to three days to use in an omelette, cake or other favourite recipe.
Top tip
Pin prick method
Carefully pierce a small hole in the pointed end of a clean egg and a larger one at the bottom. Break the yolk. Hold the egg over a bowl, smaller hole facing up, and blow gently to expel its contents. Rinse the shell and let it dry.