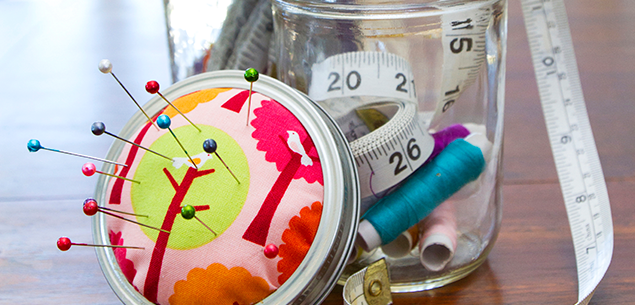
These handy little sewing kits are simple to put together and look fabulous. They also make a great gift for students or flatters, or to grace your desk drawer at work for sewing-related emergencies.

Carft materials
Craft: Sewing jars
Materials:
Preserving jar with a screw-top lid
Felt or contrasting fabric
Pen or pencil
Compact disk
Fabric – ironed
Scissors
Glue gun and glue sticks
Cotton balls
Small sewing kit

Craft: Sewing jars
Craft: Sewing jars
Step 1. Remove the screw-top lid from the jar and use the disc-shaped inner lid as a guide to trace a circle on the felt. Then using the compact disc as a template, trace a circle on the fabric for the pincushion top. Cut out the circles.

Craft: Sewing jars
Craft: Sewing jars
Step 2. Place the inner lid bottom-side up directly in the middle of another piece of the fabric. Put a dab of hot glue along the rubbery edge of the lid’s rim and press the edge of the fabric on top. Continue around the edge, bunching it up as you go.

Craft: Sewing jars
Craft: Sewing jars
Step 3. After going three-quarters of the way around, stop gluing and start stuffing between the lid and the fabric with cotton balls. It needs to be quite tightly packed.

Craft: Sewing jars
Craft: Sewing jars
Step 4. Once the pincushion is full, use hot glue to stick down the last of the fabric to the lid. Glue the felt circle that was cut out earlier over the bottom of the lid to hide where the fabric has been stuck down.

Craft: Sewing jars
Craft: Sewing jars
Step 5. Press the pincushion firmly back into the outer lid or ring. Fill the jar with the contents of the sewing kit and screw on the pincushion lid.