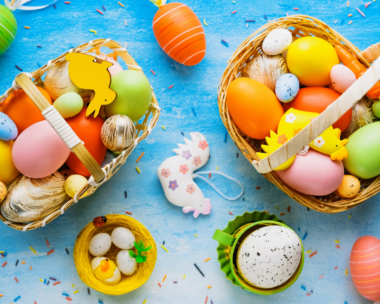
It’s nearly Easter weekend, making it the perfect time to engage your little ones in fun and easy Easter crafts that inspire creativity and provide a wonderful opportunity for family bonding.
If you’re wondering what you can make with children for Easter, check out our assortment of delightful Easter crafts below, which include egg decorating tips and cute bunny headpieces. Lastly, remember to prepare your Easter baskets for holiday gifting and egg hunts, too!
4 fun Easter crafts to try at home
1. Nail polish marbled eggs

This fun project is an ideal easter craft for school age kids. It’s also the perfect way to use up any old nail polish you have lying around the house. Experiment with colours and designs – no two eggs will turn out the same.
You’ll need:
- Decorative eggs, $10 at Spotlight (or hard-boiled eggs)
- Old container
- Nail polish, in various colours, at Life Pharmacy or Chemist Warehouse
- Protective gloves
- Wooden skewer, $3.30 at Spotlight
- Foam and pins for drying rack, $23 at Spotlight

Method:
- Before you begin, place rows of pins into foam (about 4cm apart) to make a drying rack.
- Fill container with water. Add 4 or 5 drops of nail colour onto the water’s surface. Repeat with two or more colours.
- Using the skewer, drag the colour across the surface of the water to fill any gaps.
- Gently run the skewer back and forth across the surface of the colour to create a pleasing pattern. Do not overwork.
- Holding egg between thumb and forefinger of gloved hand, roll across the surface of the colour wash, covering as much of the egg as possible
- Place on drying rack. Once dry, repeat on undyed area.

2. Decorative Egg ideas
Whether you use home-blown eggs (see tip below), hard-boiled or craft varieties, there are so many quirky and delightful ways to decorate your home this Easter.
Tip: To blow eggs, carefully pierce a small hole in the pointed end of a clean egg and a larger one at the bottom. Break the yolk. Hold egg over a bowl, smaller hole facing up, and blow gently to expel its contents. Rinse shell and let it dry.

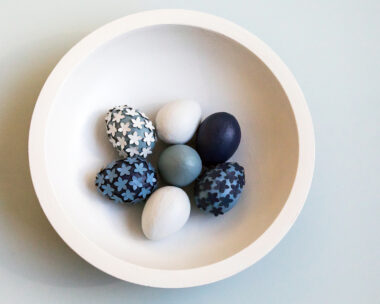
Mosaic tape easter eggs
Cut small triangles from a selection of decorative washi tape – in complementary colours – then affix to the egg randomly until covered.
Speckled easter eggs
Paint decorative or real eggs in different shades of pastel acrylic paint (mix colour with white gesso primer for a chalky candy-like finish). Dilute brown paint with some water, dip a toothbrush into the diluted paint, then run your thumb over for the bristles to flick light speckles onto the egg once the base coat is dry.
Sprinkle easter eggs
Paint PVA glue over the surface of a decorative egg, wait until the glue becomes slightly tacky, then roll in a shallow dish of 100’s and thousands. We used naturally coloured 100’s and thousands for a pastel effect.
Marker pen easter eggs
A really easy way to decorate is to create patterns and designs on the egg surface with a marker. In a large group, these are surprisingly effective.
Spotted easter eggs
Use a stencil sponge for large spots or an eraser tip on a lead pencil, dipped in paint to cover eggs in polka dots.
3. Easter bunny headpieces

You’ll need:
- Medium weight board (new or recycled from cereal or food packaging)
- Coloured paper or old wrapping paper, $35 at Spotlight
- Kids craft scissors, $5 at Spotlight
- Stanley knife, $16 at Spotlight
- Ribbon (for affixing to head), $3 at Spotlight
- Glue stick, $8 at Spotlight
- Double-sided tape, $12 at Spotlight
- Additional bits (feathers, pom poms etc.) at Spotlight

Method:
- Using the template above, trace mask base and ears on medium weight board and cut.
- Following the template guidelines, slice along the dotted lines.
- Weave the ribbon through the middle two cuts and even off so an equal length is on both sides. Weave the ribbon through each side slice. The front of the mask will have the patch of ribbon in the middle.
- Trace remaining pieces on chosen coloured paper and cut out.
- Glue teeth to the back of mouth piece and using double-sided tape, stick that across the exposed patch of ribbon.
- Get creative! Glue on other pieces how you like and decorate to add personality.
4. Easter hunt bags, Easter tags & Baby chick headpieces

Use your template pieces to create an easy egg hunt bag, Easter tags or anything else that needs an Easter touch – simply enlarge or shrink template to desired size. With the addition of the beak (found on template), you can also make this adorable baby chick.
5. Decorative pom pom hack

Use paper decorations and pom poms to create impressive flowers. Take a large pom pom and undo the wire in the middle. Do the same with a smaller pom pom and place inside the accordian folds of the larger. Tie back together and unfold as per packet instructions.


.jpg)