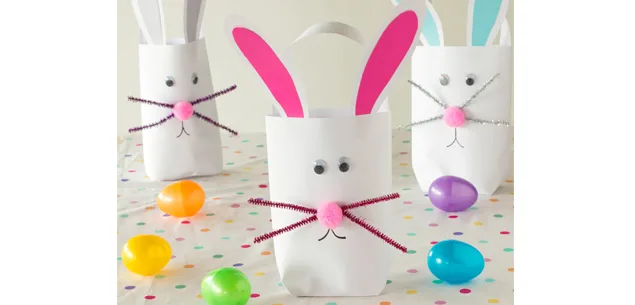
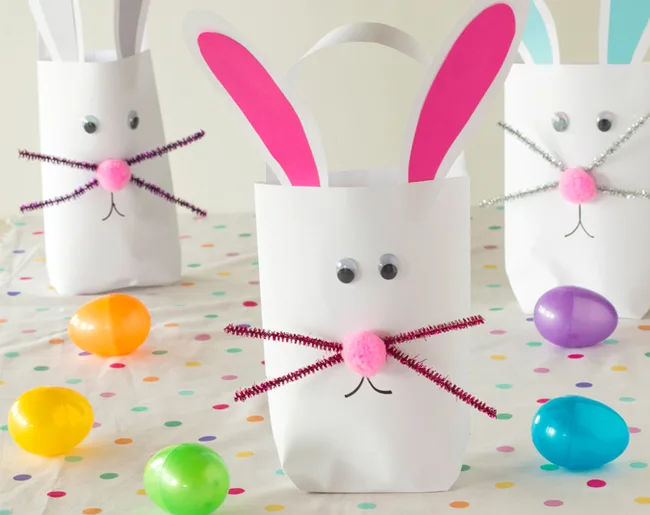
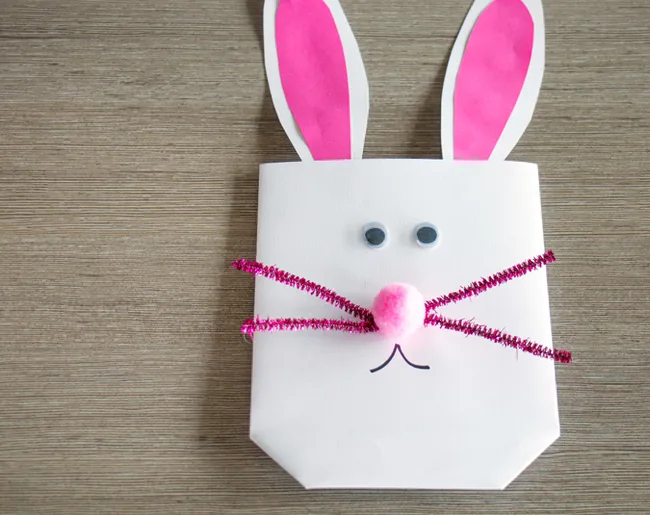
These cute little Easter bunny bags are sure to bring a smile to children’s faces. They are the perfect addition to your family Easter egg hunt.
Easter bunny bags
Make some cute Easter bunny bags with our easy-to-follow guide. They’ll be great for the kids to use on their Easter egg hunt!
Easter bunny bags what you need
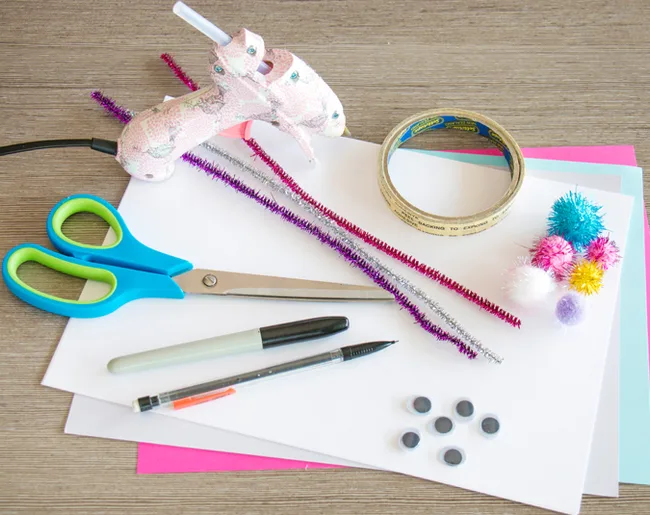
What you’ll need
• 2 x white A4 card
• Double-sided tape • Scissors
• Coloured paper
• 2 pipe cleaners
• 2 pompoms
• Hot-glue gun
• 2 “googly” eyes
• Marker pen
Easter bunny bags 1
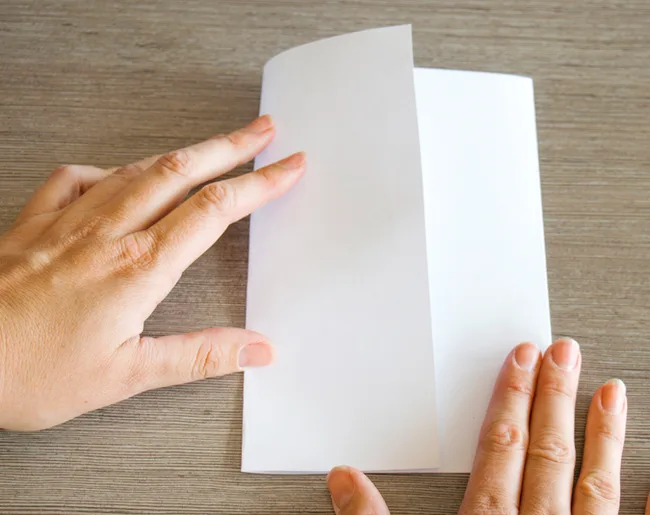
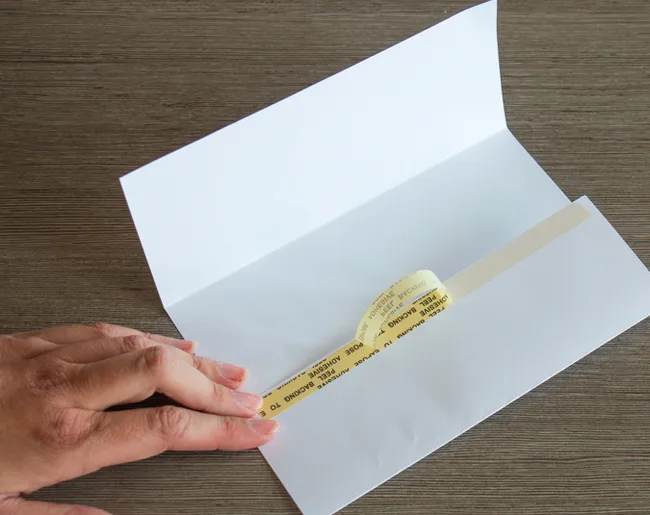
Take a piece of white card and fold the two short ends in towards the middle, overlapping the ends slightly.
Easter bunny bags 2
Secure the “seam” with a strip of double-sided tape.

Easter bunny bags 3
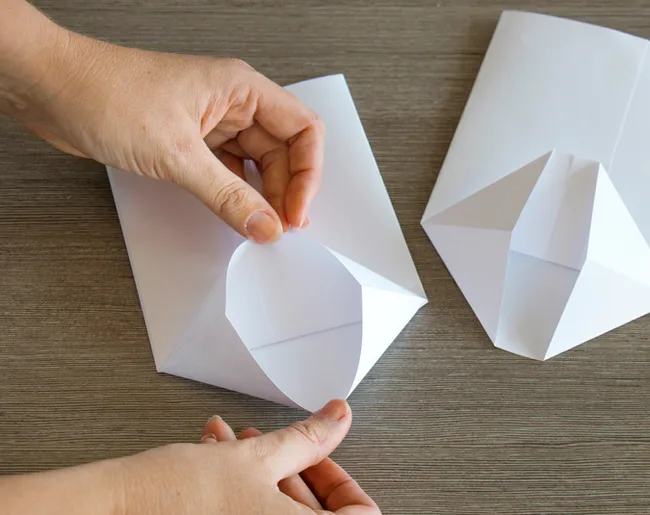
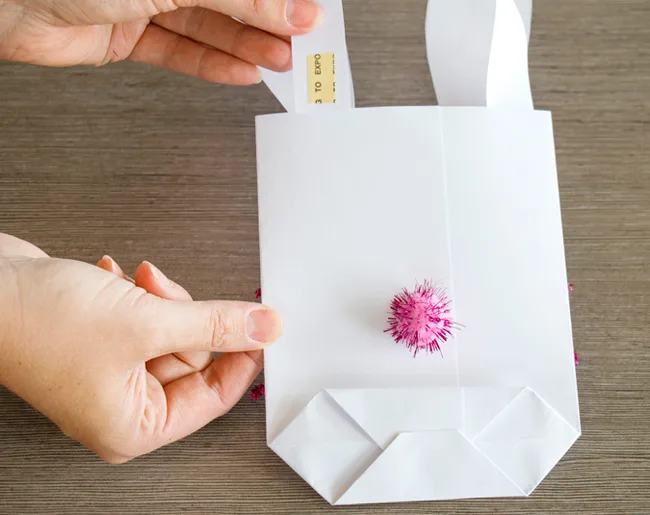
With the seam side facing upwards, fold the bottom of the bag up by about a quarter.
Easter bunny bags 4
Pull the bottom apart and form a diamond shape. Press down firmly along the folds.
Easter bunny bags 5
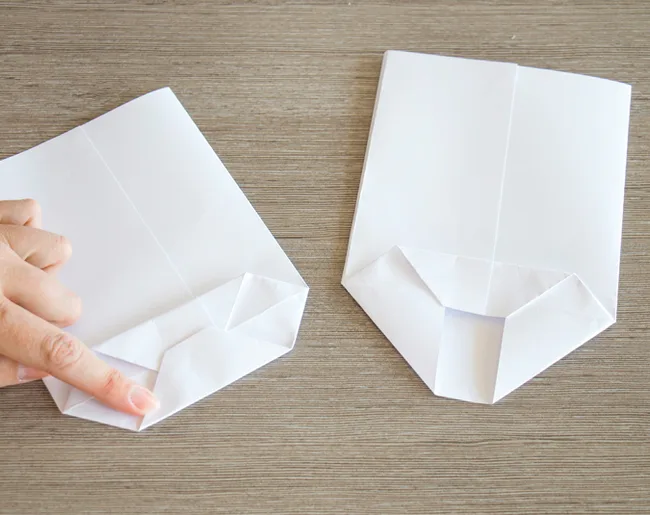
Fold the top of the diamond down and the bottom up, overlapping them slightly. Secure with a piece of double-sided tape.
Easter bunny bags 6
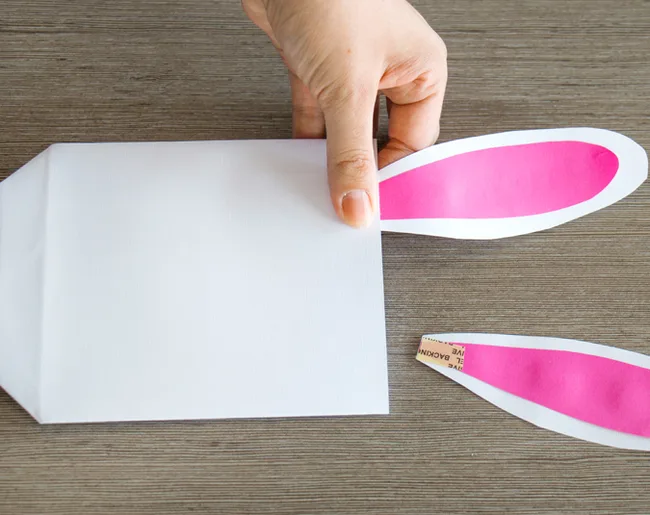
Cut out ear shapes from the remaining piece of white card and smaller shapes using the coloured paper. Stick them together with double-sided tape. Attach the ears to the front of the bag.
Easter bunny bags 7
For the whiskers, cut a pipe cleaner in half and fold each piece in half again. Attach to the front of the bag with a big blob of hot glue, pressing a pompom on top for the nose.
Attach the eyes with hot glue and draw in the mouth with a marker pen.
Easter bunny bags 8
Flip the bag over and attach another pompom for the tail. Cut a long strip of white card for the handle and attach to the top with double-sided tape.
Related stories

Native ad body.

Native ad body.


Native ad body.