We hear the sleigh bells ringing – it’s time to set the scene for celebration!
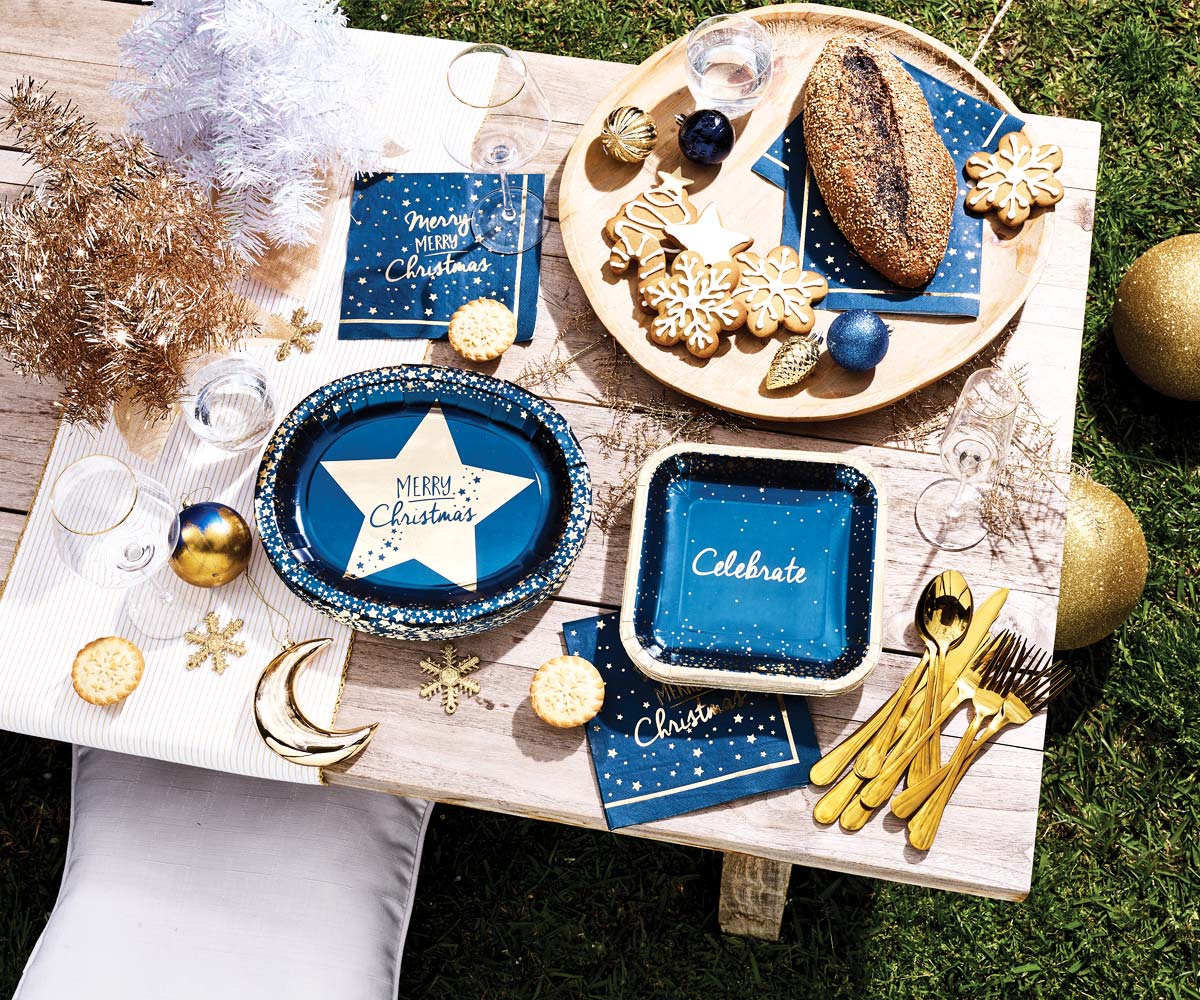
This year Spotlight’s Santa-approved collection includes lashings of crisp whites and shining gold – a classic palette that is guaranteed to lighten and brighten your living space.
Whether you’re setting the table for keenly awaited guests, baking up a storm or creating Christmas crafts, it’s easy to keep it fresh with Spotlight. You’ll love choosing from the huge range of activities, table-ware and decorations.
Stacked star Christmas trees

You’ll need:
• 30cm of 112cm-wide assorted Christmas fabric in metallic prints
• Gold or silver jingle bells
• 3mm-wide metallic gold or silver ribbon
• Hobby fill polyester stuffing
• Matching sewing thread & long doll hand needle
• Sewing machine
• Scissors, pins & tape measure
• Pencil & paper
• Iron
Instructions
1. Draw a five-pointed soft-cornered star shape in six sizes with maximum widths of 30cm, 26cm, 22cm, 18cm, 15cm and 11cm. Cut out two fabric star shapes from each of the six different templates.
2. With right sides facing, pin and sew the two largest cut out fabric stars together, leaving a 3-4cm opening along one side. Clip and trim seams, turn fabric star right way out, then press. Repeat with the remaining five star shapes.
3. Insert hobby fill stuffing
into fabric stars through the openings, then hand sew closed.
4. Using a long doll hand needle, hand sew the largest star to the next sized star through the centre of the stars, knotting thread tightly at the base of
the largest star. One at a time, continue to sew each star, according to size, to the largest two stars, stacking them and securing firmly at the base. Hand sew the smallest star to the top of the stacked stars standing up vertically.
5. Make small bows from metallic gold ribbon. Hand sew one to the middle of the top small standing star. Sew remaining bows to some of the star points, alternating with jingle bells.
Gingerbread cake

You’ll need:
• Roberts Confectionery Mudcake vanilla mix
• 8-inch round Mondo pro cake pan
• 12-inch white Mondo round cake board
• Mondo cranked spatula
• Mondo cake turntable
• 2 tubs white Over the Top buttercream
• Piping bag and coupler
• Piping tips – round size 1 or 2, star tip 16 or 18
• Mondo royal icing (optional)
• Fondtastic fondant mat
• Mondo snowflake
plunger cutters
• 225g pot white Fondtastic fondant or gumpaste
• Culinary Co Gingerbread House Mould
(Please note mould is the house only – we baked additional gingerbread
to make trees.)
Instructions
Gingerbread house preparation (optional) Bake your favourite gingerbread recipe and use the cutters from the Gingerbread House Mould to create your panels. Once the baked panels have cooled, lay them out and fill a piping bag with royal icing for decorating (do not overfill, as it will be difficult to pipe). Begin piping your design on the gingerbread panels either using templates available on Pinterest, or from your own imagination. Allow your design to dry prior to assembly and use the remaining royal icing to construct your house. Once complete, let the icing to set.
1. Bake cake according to packet instructions in three 1.5-inch-high layers. Let cakes cool and trim to level.
2. Stack cakes on cake board with buttercream in between layers. Make sure base of cake is stuck to cakeboard using buttercream or melted chocolate. Smooth buttercream over outside of cake in thin layer (called a crumb coat) with spatula and chill for at least 15 minutes. This initial layer does not have to be perfect. The aim is to keep the crumbs of the cake from showing in the second layer.
3. Repeat the process of covering crumb coat in smooth layer of buttercream for final outer layer. For semi-naked appearance (when cake can be seen through buttercream),
chill final outer layer for 15 minutes. Warm a long spatula (or metal cake scraper) and carefully spin cake around on cake turntable while scraping outer layer off to achieve your desired effect. This will prevent the outer layer from becoming “dirty” with cake crumbs.
4. Place the gingerbread house on the cake and complete decorating your gingerbread house with leftover royal icing to create a snow effect.
5. Prepare fondant or gumpaste according to instructions. Roll out using rolling pin to thin layer on Fondtastic fondant mat. Cut out snowflake shapes using plunger cutters. Allow to firm up (gumpaste will dry quicker than fondant) so they can be handled and placed on cake and or cake-board as you wish. You may need a small amount of icing to fix to the cake.
Box advent calendar

You’ll need:
• Kaisercraft Box Advent Calendar kit
• Kaisercraft Starry Night 12 x 12-inch paper pad
• Navy paint
• Gold washi tapes in miscellaneous shades
Instructions
1. Carefully separate the pieces of the Box Advent Calendar kit and sand smooth. Do not sand off the wider tabs as these are the ones you need to assemble.
2. Before painting, put the unit together without gluing it so you know where each piece is positioned. Use navy paint to paint the back, shelves and all the edge pieces. Allow to dry and reassemble unit
with dividers.
3. Cut strips of blue brick patterned paper the width of the unit and adhere around the outside of the box. Cut another piece of the blue bricks into a rectangle the size of the frame and glue to the back piece. Cover the inside walls of the frame using patterned paper.
4. Assemble all of the little boxes, taping together each side for added strength before covering in strips of paper.
5. Cut up the page of numbers and adhere each square to the front of each box.
6. Decorate the inside of the frame by cutting up floral elements from the papers and layering. Embellish further as desired.
Star wall hanging

You’ll need:
• 4 x Sculpey III Clay,
57g in white
• Sculpey Clay tool starter set
• Rolling pin
• Wilton star cut-outs in silver
• Needle or punch tool
• Baking paper
• Twine
• Dowel rod
• Scissors
Instructions
1. Preheat oven to 130°C.
2. Roll out white Sculpey until it’s about 0.5cm thick.
3. Using the star cookie cutters, cut star shapes out of the Sculpey in varying sizes.
4. Using a needle or punch tool, create a hole at the top of each decoration for hanging.
5. Lay decorations on a baking tray between two sheets of baking paper and bake for 15 minutes at 130°C. Leave the decorations to cool before handling.
6. Cut varying lengths of twine – longer ones for the larger stars and shorter ones for the smaller stars – and tie them around each decoration, securing with a knot.
7. Hang your decorations on the rod so the stars go from small to larger in a diagonal pattern.
8. Secure your hanging firmly to the wall. It can function as a year-round decoration and will look great in children’s bedrooms – just be sure to keep it well out of reach of curious little hands!
Share in the festivities. Go to spotlightstores.com/nz or @spotlightstores on Instagram #makeitmerry