What you’ll need
– Air drying clay (I used Polyform Model Air, 1kg, from Gordon Harris art supplies)
– A selection of garden foliage with interesting markings, including leaves, twigs and seeds
– Cork coasters (available at Spotlight, or make your own from a sheet of cork)
– Rolling pin (smooth) or glass jar
– Craft knife
– Tweezers
– Small piece of card and pencil
– Scissors
– Fine sandpaper (optional)
– Acrylic paint (colours of your choice to suit your decor)
– Paintbrush
– Sponge or cloth
– Superglue
– Matt varnish/sealer

Steps
1. Ensure you have a clean surface, free of any textures and dust. Using a rolling pin or jar, roll out the clay until it is about 7mm thick. Roughly cut into squares that are big enough to fit a cork coaster with some overlap.
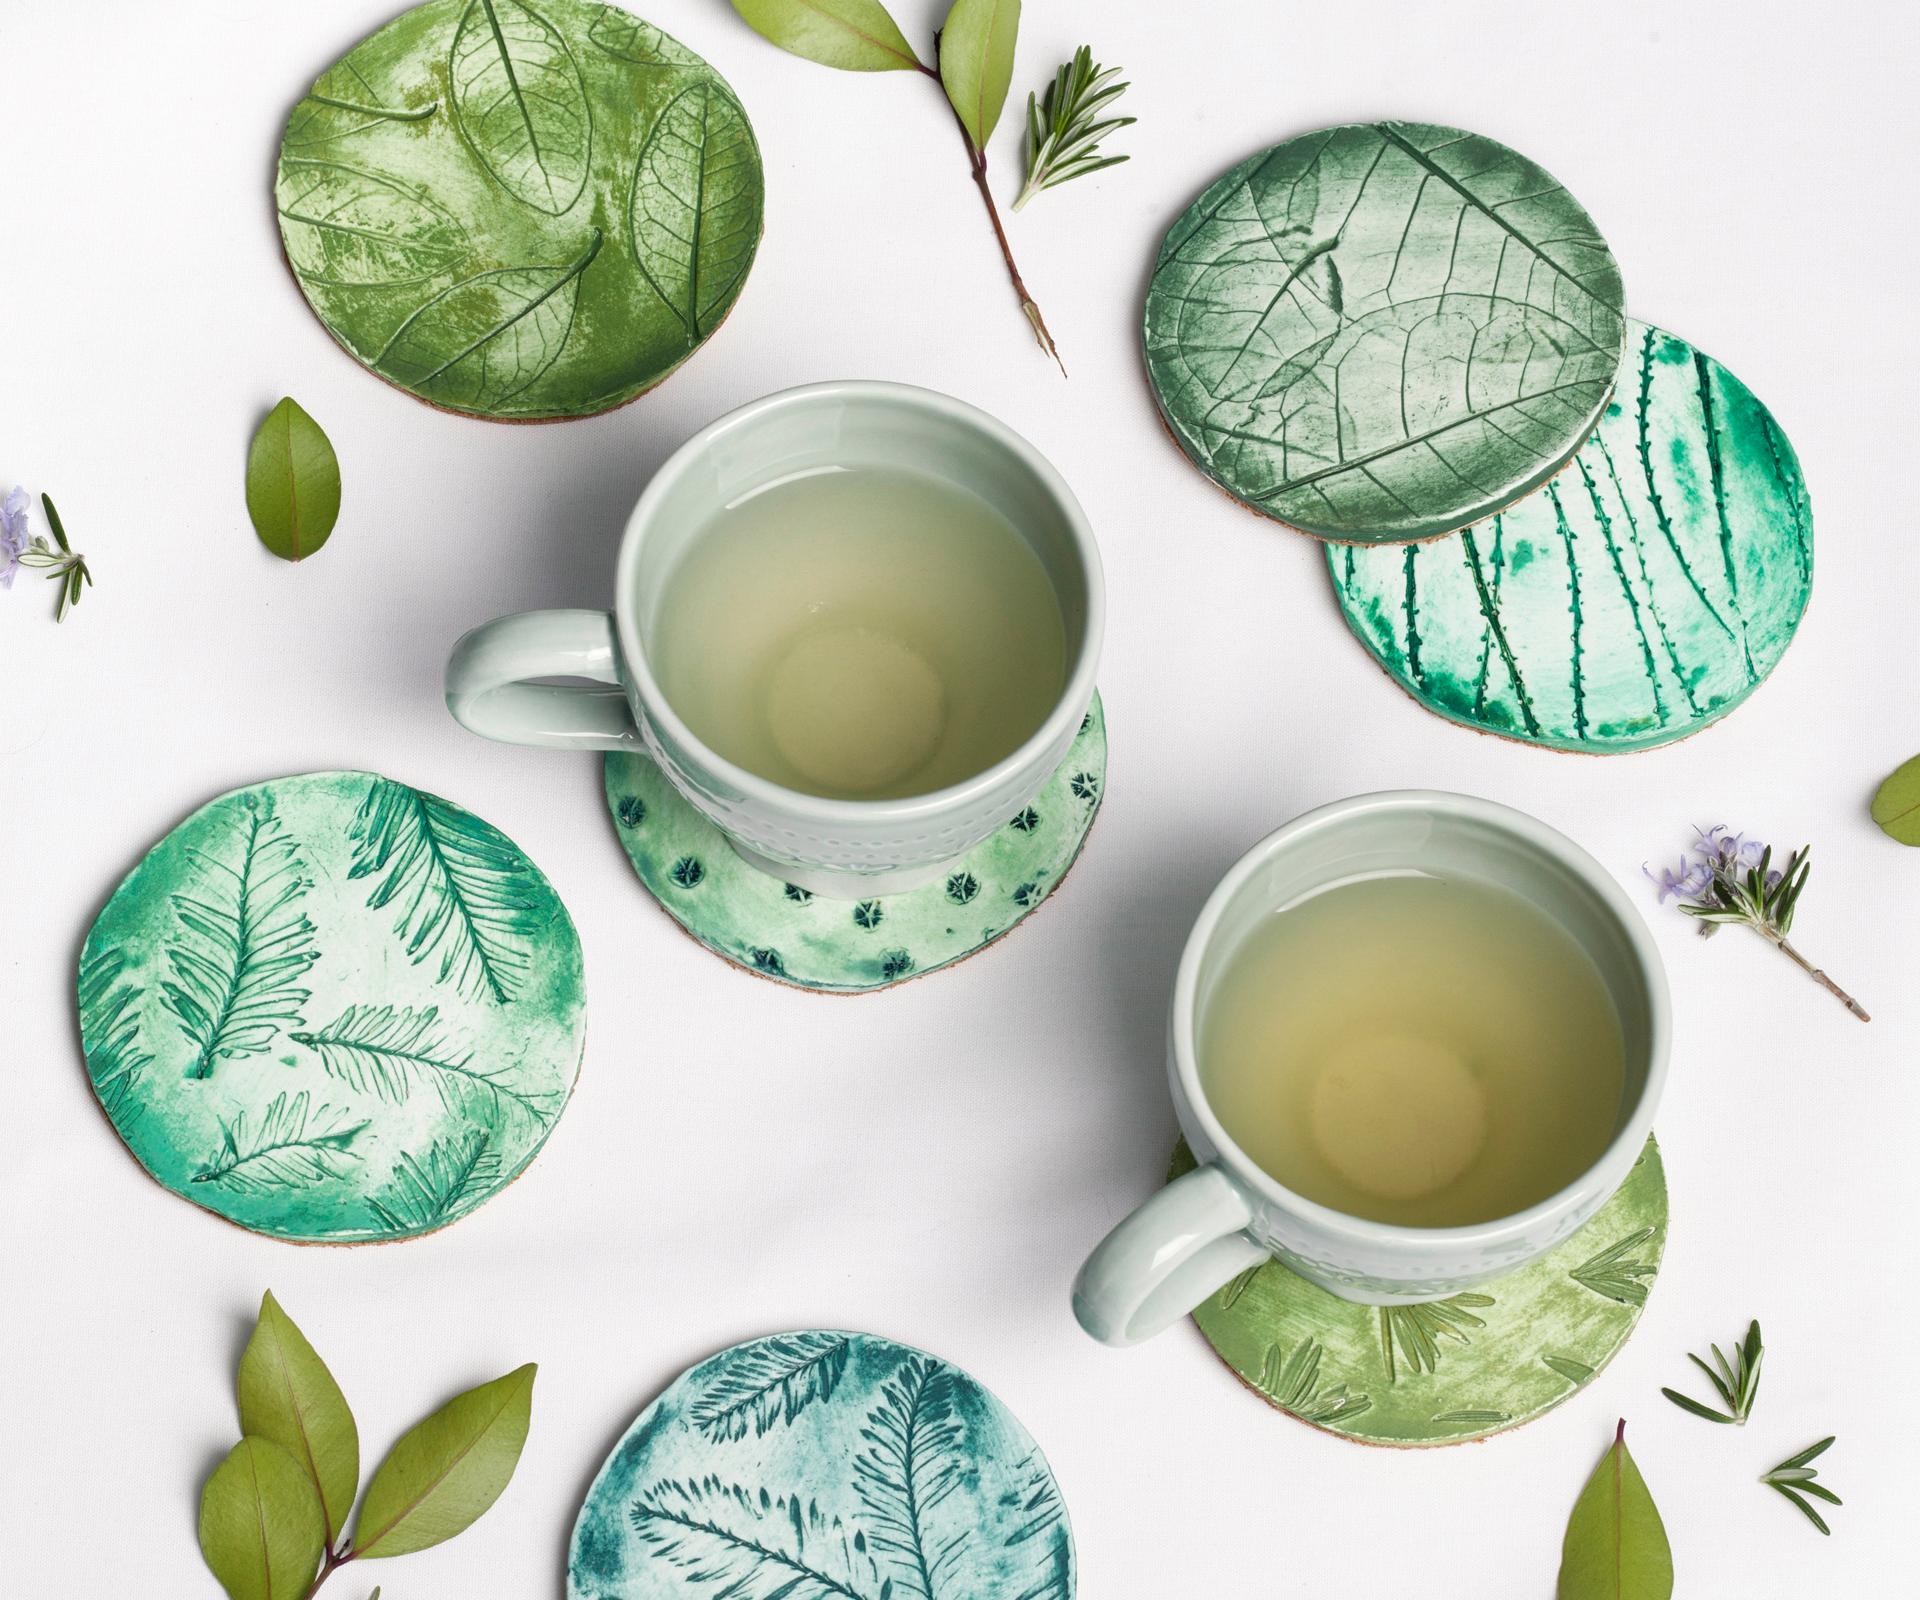
2. Take pieces of foliage and press into the clay squares to make interesting patterns and designs. The imprint doesn’t need to be very deep – you’ll be surprised at all the tiny details that become obvious once the coaster is painted. Use tweezers to help peel back the finer and smaller foliage from your clay so you don’t leave any fingerprints behind.
3. Repeat until you have the pattern you desire on each square. Don’t worry if you’re not happy with the pattern, as you can always roll it up and start again before the clay dries.
4. Trace around a cork coaster on card to make a template. Use scissors or a craft knife to cut out the card template.
5. Carefully put the template on top of an imprinted clay square. Lightly holding the template in place as a guide, use a craft knife to cut the clay into a circle. Repeat with all your clay squares and set aside to dry for 24-48 hours, depending on clay instructions. (Alternatively you can always use a large circular cookie cutter if you have one, instead of using a template.)
NOTE: The brand of clay used in this project was ideal due to its flexibility and durability once dried. It doesn’t shatter like other air drying clays, which is important as the finished coasters need to be able to support a heavy glass or cup without breaking.
6. Once dried, you will notice that your imprinted circle has shrunk slightly due to the moisture evaporating from the clay. Don’t worry, as the cork coaster can be trimmed to fit after it has been glued to the clay.
7. Depending on how rustic or perfect you’d like the edges, now is the time to give the clay coasters a very light buff around the edges with fine sandpaper (wipe dust residue away with a dry brush before painting).

8. Choose an acrylic paint colour and paint over your clay coasters. Use a sponge or dry cloth to rub the paint into all the fine lines and crevices created by the foliage. Keep rubbing until you achieve the effect you desire. Have areas of light and dark to create contrast and a standout pattern. Repeat this process on all your coasters and, once again, set aside to dry.
9. Superglue the clay discs to the cork coasters and allow to dry. Once set, use your craft knife to cut off any excess cork for a perfect fit.
10. Finally, seal your coasters using two coats of matt varnish/sealant so that they may be wiped clean after use. Once completely dry, get ready to show them off at your next tea party!
NOTE: The finished coasters are wipe-clean only – do not soak them or put them in the dishwasher.